
OMEdit Workflow
Use OMEdit when you want to browse diagrams, inspect parameters visually, run quick manual experiments, view animations, or capture screenshots for documentation.
Prerequisites
- A full OpenModelica installation that includes OMEdit
- Modelica Standard Library
4.1.0 - VehicleInterfaces
2.0.2 - The BobLib repository available on a local filesystem path without unusual permissions
- On Linux, desktop/X11 or Wayland integration for Qt applications
- On Windows, the standard OpenModelica installer is the preferred route
- On macOS, native OpenModelica packages are limited; use the official macOS notes, a supported Linux/Windows host, or a VM if you need a supported OMEdit workflow
Linux package note: installing only omc is enough for CLI work, but not for OMEdit. Install the full OpenModelica package set from the official repository when you need the GUI.
Open BobLib From Scratch
Start OMEdit with no BobLib package loaded.
Open the File menu with
Alt+F, pressDownuntilOpen Model/Library File(s)is highlighted, then pressEnter.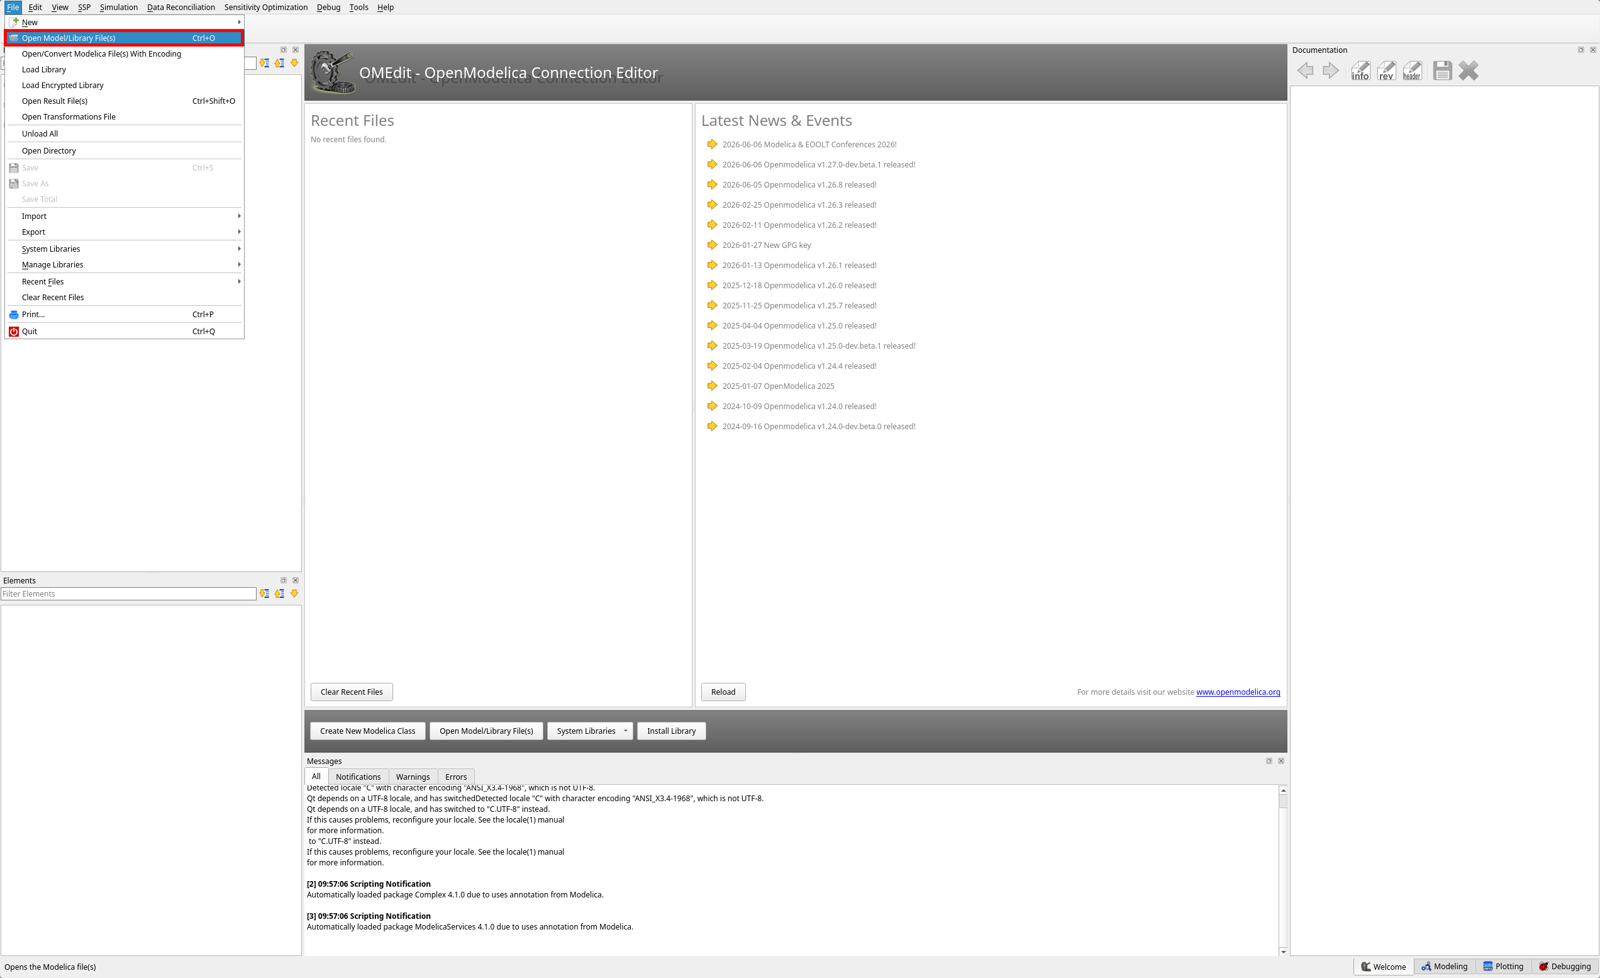
In the file chooser, browse to the BobLib repository if needed, select the package entry point, and open it:
textBobLib/package.mo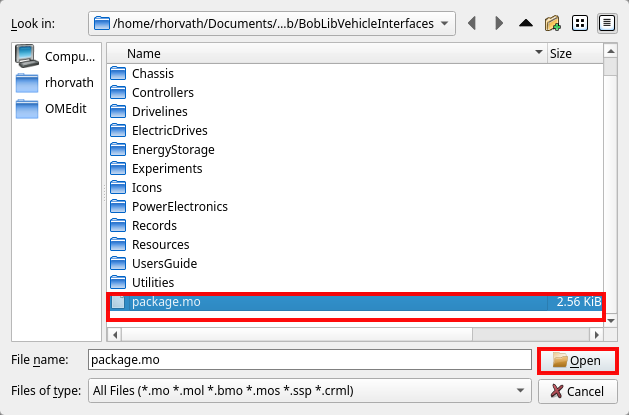
In the Libraries browser, expand:
textBobLib > Experiments > StandardsStart with one of the standard experiment models:
textBobLib.Experiments.Standards.VehicleSim BobLib.Experiments.Standards.FourPostSim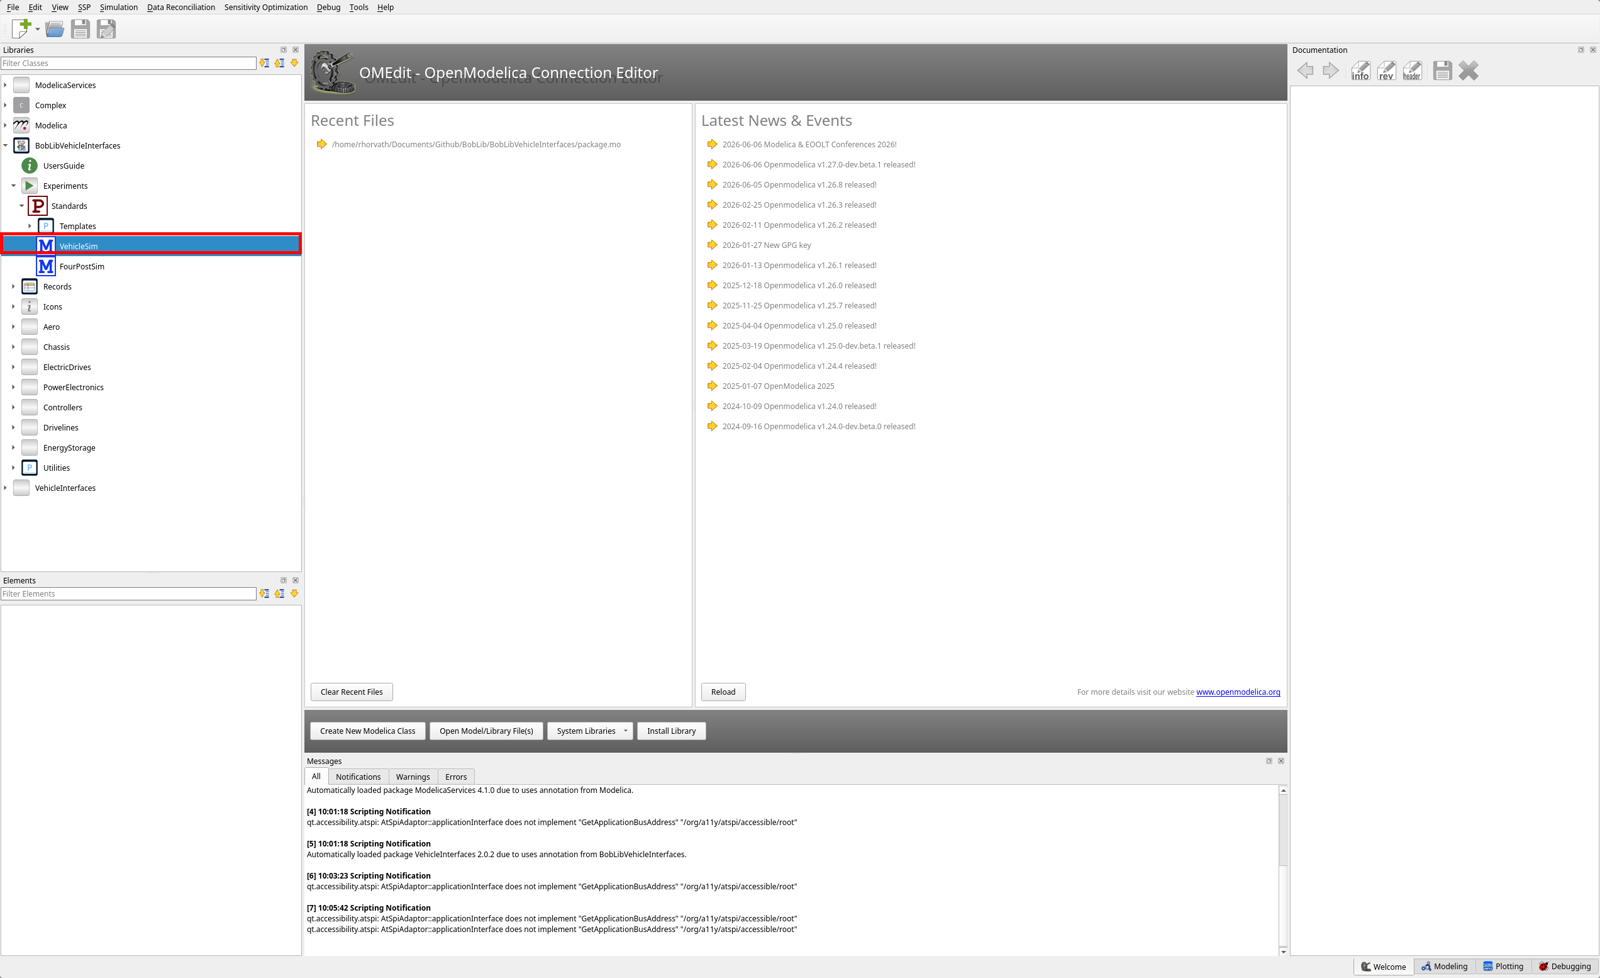
If OMEdit reports a missing
ModelicaorVehicleInterfacespackage, install the missing library, restart OMEdit, and reloadBobLib/package.mo.
Run Locally In OMEdit
Start OMEdit and load
BobLib/package.mo.Set a scratch working directory from
Tools > Options > General, for example:text/tmp/BobLibOMEditOpen one of the standard models:
textBobLib.Experiments.Standards.VehicleSim BobLib.Experiments.Standards.FourPostSimUse
Check Modelas a lightweight package/model sanity check.Open
Simulation Setupfrom the model toolbar to review start time, stop time, communication interval, solver method, tolerance, output format, and simulation flags.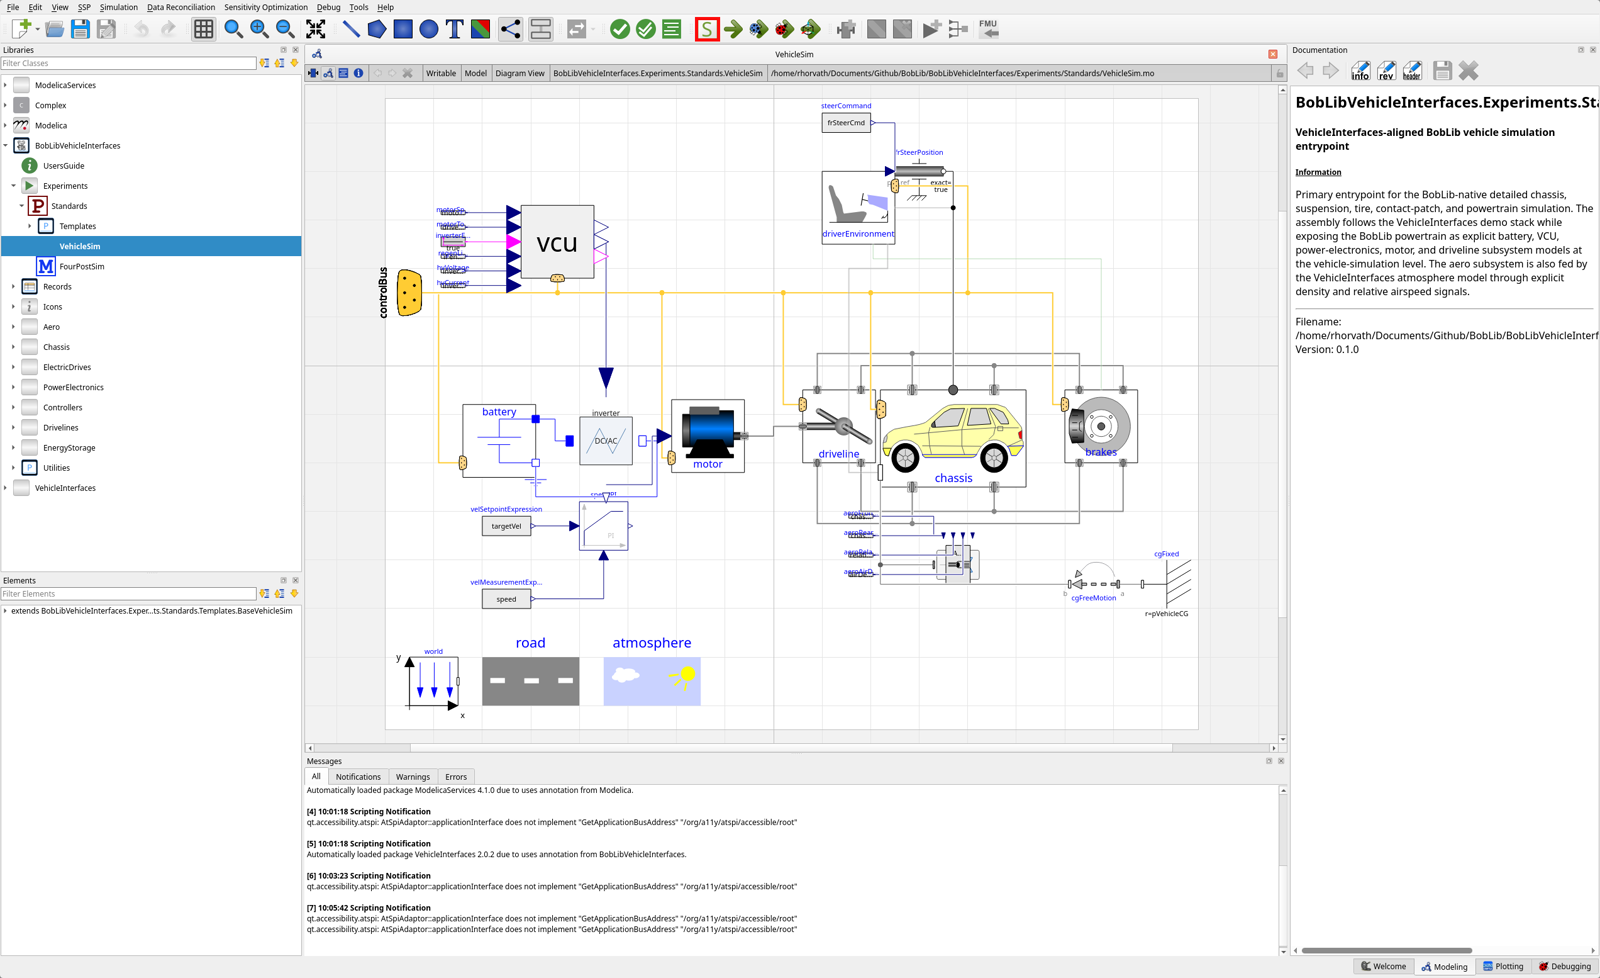
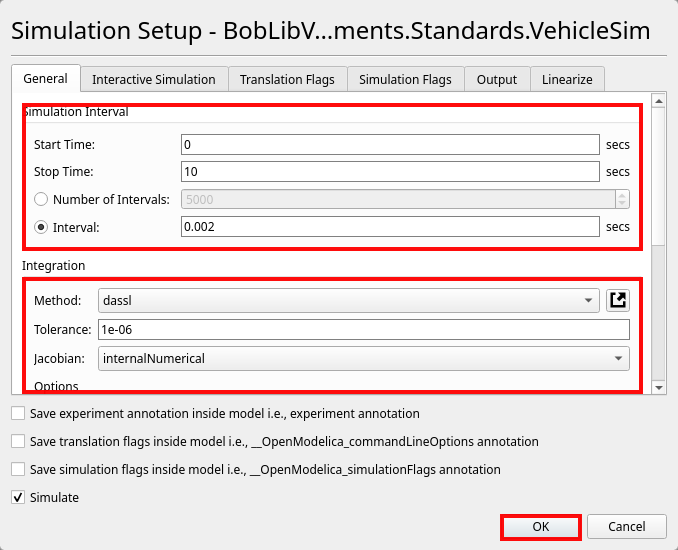
Click
Simulate.Inspect variables in the Plotting perspective after the run finishes.
OMEdit creates a model-named subdirectory under its working directory for each simulation. That directory contains the translated model artifacts, executable, initialization XML, logs, and result files. If a run gets weird, clear that model's scratch directory and simulate again.
Animation
The public standard models default to animation visible:
inner parameter Boolean headless = falseSet headless=true on the standard model when you want a batch or CI run without MultiBody visualization geometry.
Maintained Screenshots
The OMEdit screenshots used on this page are stored under docs/public/images/omedit/ and are served from /images/omedit/ in the site. Refresh them from a clean OMEdit session when package loading, tree traversal, diagram layout, or Simulation Setup defaults change.